Christmas Craft Countdown- 1 day
Yay! We are finally here! Only one more day until Christmas! Today, I have my final Christmas craft to show you. They are super cute holiday birds. Again, these make adorable presents and look lovely hanging up in your home for the Christmas season! I found these images on Pinterest and used them as my inspiration. Enjoy!
While the Mod-podge on the hat and wings dried, I used a dime to trace several circles onto the body.
Then I traced the dots with my green sharpie.
Here is the finished Christmas Owl:
Isn't he adorable? If you want to give this as a gift, simply add a cute ribbon around the canvas!

While the glue dries, take your green puffy paint and add dots for texture on the bird's body.
Supplies:
- Canvas (8 x10 or larger)
- Green, red, brown and silver acrylic paint
- Green, red, brown, silver, gold and black sharpie markers
- Red puffy paint
- Rhinestones
- Red and green glitter
- Pencil
- Mod-podge (or watered down Elmer's glue)
- Paintbrush
The Christmas Owl
First I'll show you how to make this adorable Christmas Owl! I was inspired by this image I found on Pinterest and decided to mix and match to create my own owl.
: 
First, I sketched the owl out with my pencil. (You could always print out the image and trace.)
Then, I traced over the pencil with colored sharpies that corresponded with the color I would be painting that section.
Next, I painted Mod-podge on the owl's hat and the wings and sprinkled the red glitter on them.
Once it was dry, I went over the glitter with a coat of Mod-podge to seal it in so it does not fall.
While the Mod-podge on the hat and wings dried, I used a dime to trace several circles onto the body.
Then I traced the dots with my green sharpie.
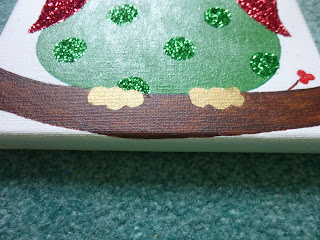
Next, I painted the body with green acrylic paint. After it was completely dried, I put Mod-podge on the dots and sprinkled green glitter on them.
I painted the fluffy part of the hat in a light silver acrylic paint. I figured it would stand out better against the white background of the canvas. Then, I glued down the rhinestones for some added dimension and sparkle!
I colored his beak and his feet with my gold sharpie, and colored in the branch with my brown sharpie. If you don't have colored sharpies, you could always just use acrylic paint for this part, too.
Here is the finished Christmas Owl:
Isn't he adorable? If you want to give this as a gift, simply add a cute ribbon around the canvas!
The Christmas Bird
Now, how to make the Christmas Bird! I was inspired by this photo on Pinterest to create my own variation of a Christmas bird:
First, you want to sketch or trace your bird onto the canvas.
Trace over the pencil lines with green and red sharpie markers.
Using acrylic paint, paint the hat and wing red, the fluffy part of the hat a light silver, the body and leaves green, the beak gold, and the branch brown.
Allow this to completely dry before moving on.
Using red puffy paint, trace over the words "Merry Christmas" or whatever holiday saying you choose to write.
Then using Mod-podge, paint a thin layer of the glue onto the hat and wing. Sprinkle red glitter over top.
While the glue dries, take your green puffy paint and add dots for texture on the bird's body.
You can also use red puffy paint to make the berries 3D.
Then, you want to put another layer of Mod-podge over top of the glitter to seal it in and prevent it from falling off.
And there you have it! An adorable Christmas Bird!
I wish everyone a Merry Christmas and a healthy Happy New Year!
Stay tuned for more crafts in 2014! Feel free to comment with suggestions, too.
Visit my Facebook page: https://www.facebook.com/TheBeachBirdBoutique
Visit my Etsy page: https://www.etsy.com/shop/TheBeachBirdBoutique
Artistically Yours,
Brianna


No comments:
Post a Comment