Christmas Craft Countdown- 4 days
Only four more days until Christmas! Today I have two lovely crafts for you. They were simple and easy to create; no need to be an artist!

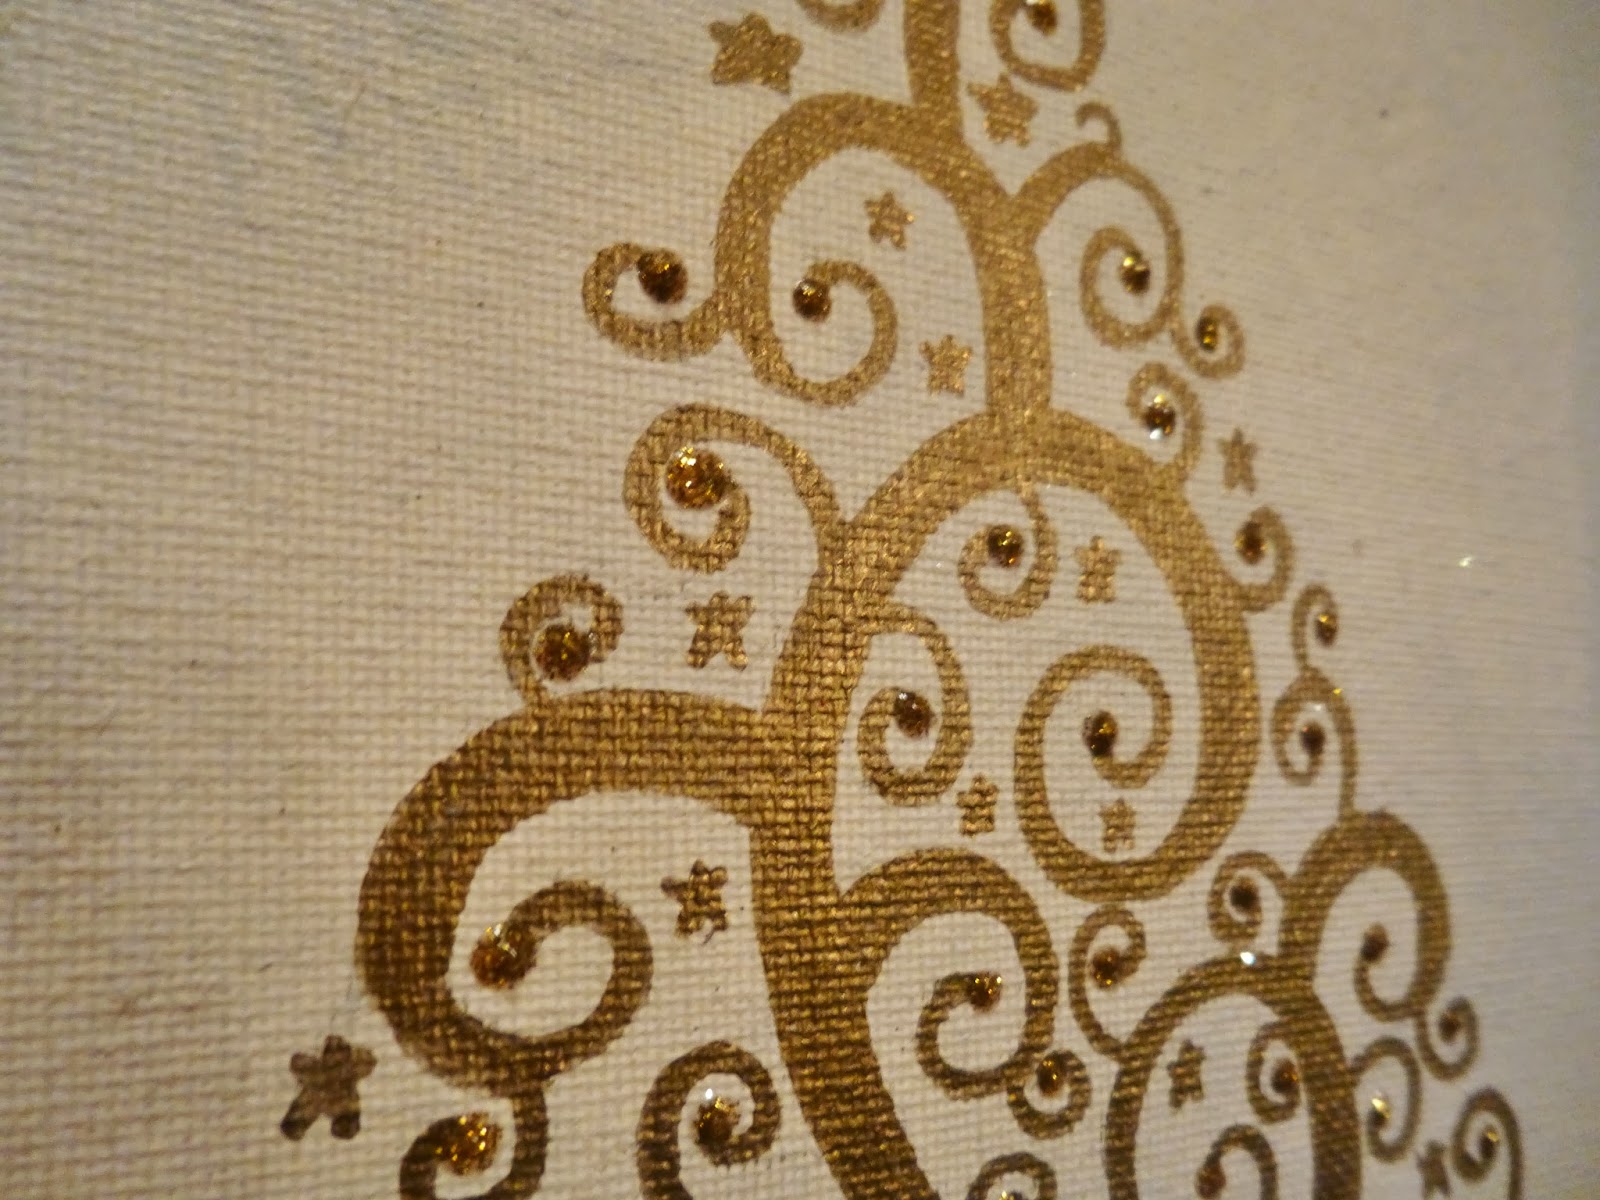
I googled some images of Christmas Tree clip art and found these two images. I then recreated them on a piece of 8 x 10 inch canvas board using puffy paint and sharpie markers. Here are the links to my inspirations:
Supplies you will need:
- Canvas in the size you prefer (I used 8 x 10)
- Gold Sharpie Marker
- Puffy paint in red, green, and gold
- Rhinestones
- Pencil
- Ruler
Step One:
Start off by sketching a triangle onto your board so you know how big you want your trees to be. Use a ruler and a pencil to achieve this.

Step Two:
Start sketching out the swirls you want with your pencil. You can choose to do this free hand like I did, or simply print out the clip art and trace it if that is easier for you.


Step Three:
On the gold tree I went back and thickened some of the swirls. And on the red and green tree I started to add in the dots for the red ornaments.
Step Four:
On the gold tree, lighten up your pencil lines with an eraser and begin to trace them with your gold sharpie. Then proceed to color the lines in with the gold sharpie.


Step Five:
Add your puffy paint!
I only used red and green puffy paint to trace the pencil lines on the red and green tree. I love how the puffy paint adds so much dimension to the canvas!
I started with the green swirls. Then once they dried, I added in the red ornaments.


For the gold tree, I didn't want to go crazy with the puffy paint so I just added a few dots the the ends of the swirls. Again, you don't have to use the puffy paint at all, I just like how it adds extra dimension.

Step Six:
For the red and green tree, I didn't like how my opened circle ornaments were not perfectly round. So, I fixed this by adding some round rhinestones in the center. I just added more puffy paint to the center of the circle and stuck the stone in it. (You could use glue of course, but since I already had the puffy paint out, I figured I'd use it!)

Step Seven:
Take your eraser and erase any remaining pencil lines after the paint has dried. And now you are finished!
These adorable trees were super easy to make and you can get very creative with them by simply adding puffy paint, rhinestones, or glitter! Have fun and use your imagination to come up with tons of different trees! They make wonderful handmade Christmas gifts and would be cute to make with kids too! I'd love to see how these trees would look on a larger canvas, too. I can't wait to give these to my friends and family.


I hope you enjoyed this craft! I'll be back tomorrow for another craft as we continue our Christmas Countdown!
Artistically Yours,
Brianna
No comments:
Post a Comment